Hi guys,
Today, we have registered a single app in Azure to be used across multiple development machines.
In the previous stage, I had registered an app for each machine. However, based on the concern raised by one of our Azure developers, I have to create only one app for all non-production machines. To implement this, I followed the below steps:
Step 1:
Step 2:
- Search app registration in the search bar.
2. click on the new registration
Step 3:
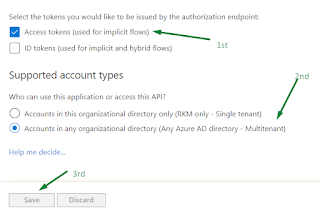
1. Provide a Name for your App.
2.
Select
Any Azure AD directory – Multitenant)
3.
Click on the Register
button.
4. Save the client id and tenant Id
Step 4 :
1.
Select the Certificates
& secrets.
2.
Click on New client
secret.
Step 5 :
1.
Provide a Description.
2. Choose Expires value.
3.
Click on Add.
4. Save the Secret value.
Step 6 :
1.
Click on API permissions.
2.
Click on Add a permission.
Step 7 :
1.
You can see the list of all available APIs.
2.
Select Dynamics ERP API.
Step 8 :
1.
Select the Delegate
permissions and scroll down.
Step 9 :
1.
Select 3 (AX,
custom service, Odata) as per the below screenshot.
Step 10 :
1.
Scroll up and select the Application permissions.
2.
Select the connector.
3.
Click on
Add permission.
Step 11 :
1.
Select the Grant
admin consent.
2.
We don’t have access that’s why it is disabled
in the below screenshot.
Step 12 :
1.
Click on Manifest.
2.
Update allowPublicClient to true and oauth2AllowImplicitFlow to true.
Step 13 :
1.
Click on Save.
Step 14 :
1.
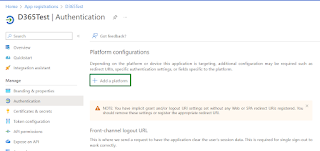
Go to Overview
and click on Add a Redirect URL.
Step 15 :
1.
click on Add
a Platform.
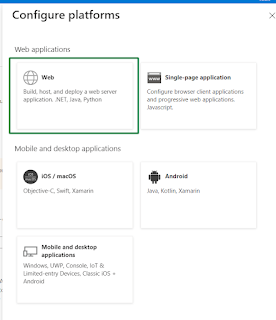
Step 16 :
1.
Select the Web.
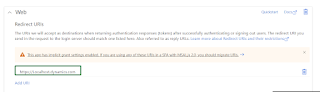
Step 17 :
1.
Provide the URL(Dev 01)
2.
Click on Configure.
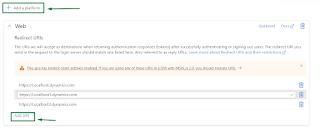
Step 18 :
1.
Redirect URIs configured successfully.
Step 19 :
1. Make sure the below 2 options will be as per the below screenshot.
Step 20:
1. We can add multiple dev machine URLs using Add a Platform or Add URI.
Keep Daxing!!


