Sunday, April 27, 2025

How to Call Key Vault Secrets in an Azure Function


    1. To access Key Vault secrets from an Azure Function, you need to install the following NuGet packages in your project:

  • Azure.Identity
  • Azure.Security.KeyVault.Secrets

    2. Below is the method I wrote to access Key Vault secrets.

internal string GetSecret(string secretName)
{
    string keyVaultName = Environment.GetEnvironmentVariable("keyVaultName");

    string kvUri = $"https://{keyVaultName}.vault.azure.net";

    SecretClient client = new SecretClient(new Uri(kvUri), new DefaultAzureCredential());
    var secret = client.GetSecretAsync(secretName).Result;

    return secret.Value.Value;
}

    3. The Key Vault name is retrieved from an environment variable.

string keyVaultName = Environment.GetEnvironmentVariable("keyVaultName");

    4. I trigger the GetSecret method from the Azure Function and assign the secret value to the response.

    5. After publishing the Azure Function, you need to add the Key Vault name as an environment variable in the function app settings.


Follow these steps to configure the identity and assign the roles:

    1. Open the Identity section in the Azure Function app settings, enable the status, and click on Azure role assignments.


    2. Click on Add role assignment, and set the scope to Key Vault.

    3. Assign the appropriate resource (Key Vault) and role(Key Vault Secrets User).


    4. The role is now assigned, and the Azure Function can access the Key Vault.
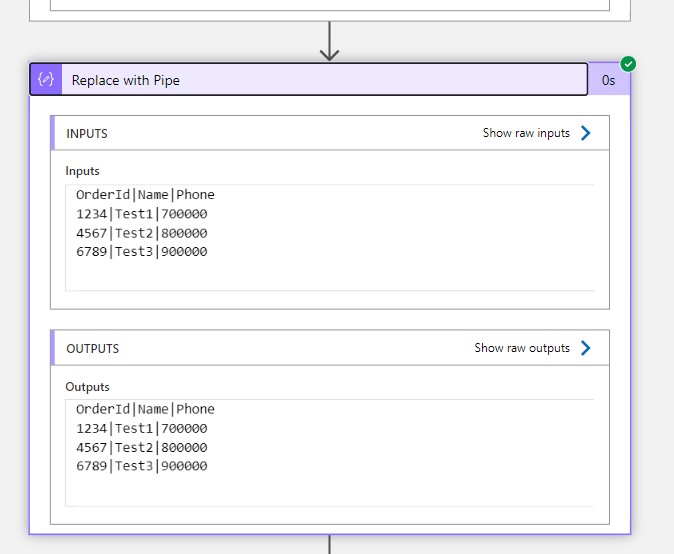
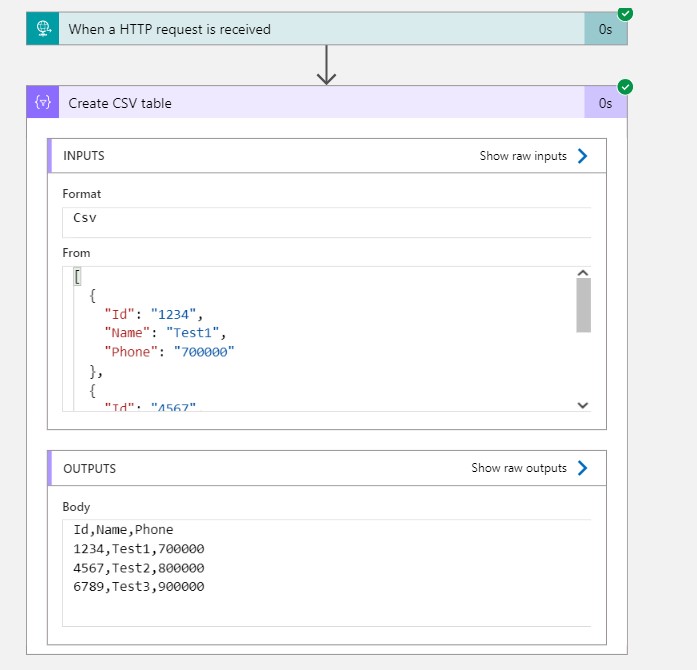


    OutPut: 

 
Keep Daxing!!

Tuesday, April 15, 2025

Convert JSON to CSV/Text file in Logic app

Convert JSON to CSV/Text file in Logic app

This is the full step-by-step process, and I have provided its output below.


I used the below JSON to test this.

[
  {
    "Id": "1234",
    "Name": "Test1",
    "Phone": "700000"
  },
   {
    "Id": "4567",
    "Name": "Test2",
    "Phone": "800000"
  },
   {
    "Id": "6789",
    "Name": "Test3",
    "Phone": "900000"
  }
]

Please follow the below steps.


        Step 1: I have used 'When a HTTP request is received'  action.


Way 1: Manual step(Will add fields manually and assign the values) I have pipe CSV.

        Step 2: Under data operations, I chose 'Create CSV table.'  
                      

  •  We need to assign a value to the 'Value' node using the following expression, based on the header fields .
  •  I am generating the file with a pipe('|') that's why I have selected the custom.                   

  Value : item()?['Name']


        Step 3:  used the 'Compose' action and applied the 'Replace with pipe' function.

        replace(body('Create_CSV_table'), '|,|', '|')


        Step 4: The resulting file is stored in a blob        


    OutPut:   


Way 2: Automatic

    If we want same Column names then use Automatic system will generate the file with commas (',') separated.


Keep Daxing!!